Hey there, fellow WooCommerce manager!
If you’ve ever felt like juggling your WooCommerce products is a bit like herding cats, you’re in the right place.
Whether you’re just starting out or looking to streamline your online store, this guide is here to simplify product management in WooCommerce. Are you ready to turn your messy closet into a neatly organized fashion haven where everything is just one click away? Grab your favorite beverage, kick back, and let’s dive into making your WooCommerce product management a breeze!

We are a full-service agency with expertise in designing, developing, and managing WooCommerce stores for clients across the world. Get your free quote today.
Product Types in WooCommerce
When adding or modifying a product in your WooCommerce store, you have the freedom to pick between some default product types: Simple, Grouped, Variable, or an external / affiliate product.
- Simple Product – This is your straightforward item, like a single t-shirt in one size and color – nothing fancy, just click and buy!
- Grouped Product – Think of this like a family bundle – it’s a collection of similar products sold together, like a set of Harry Potter books.
- Variable Product – Imagine you’re buying shoes and you get to pick your size and color; that’s a variable product with different options under one listing
- External / Affiliate Product – This is when you’re browsing your favorite blog, see a cool gadget, click the link, and it takes you to Amazon or another site to buy it instead.
Most e-commerce business will be dealing with Simple, Grouped and Variable products. Affiliate marketers on the other hand will use the external / affiliate products a lot.
Now that we know the different product types that come pre-built into WooCommerce, let’s discuss the different workflows you can use to manage these listings.
Manually Adding Products
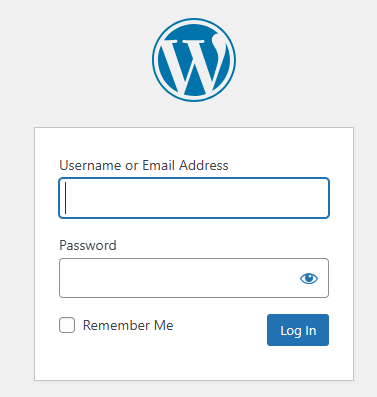
- Make sure you are logged into your WordPress Admin Dashboard, by default, it is accessible by visiting: “yourwebsite.com/wp-admin/
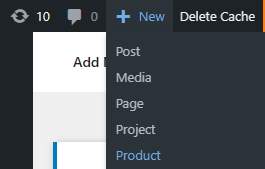
- You can add new products by clicking on the “Product” option from the “+ New” dropdown on the top bar.
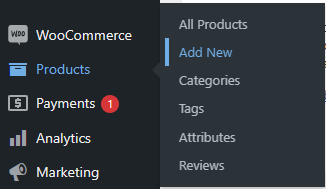
- You may also do so by clicking on “Add New” under the “Products” menu on the sidebar.
Product Name
This needs to be concise, standardized, and SEO optimized. Your primary keyword should be placed here as well. Here are some examples:
- Father’s Day T-Shirt – Black
- Coffee is Love, Coffee is Life – Black Ceramic Mug
- Peppermint Mentos – Pack of 50
Product Description
This is where things get complex. You should aim for at least 200 to 300 words but look at your competition first! Search for a product offered by your competitors and see how long their descriptions are, what information they have added or omitted, and aim for something similar.
They must be doing something right to be at the top of the search results page, right? We always recommend our clients to avoid experimentation with SEO during the first few quarters of their launch. Once you start seeing organic traffic, it’s time to pump things up a notch!
- Write at least 200 words.
- Do some research and see what’s working for your competition.
- Answer questions that potential buyers might have.
Short Product Description
Most themes will display the short product description right underneath the product name and right above the add to cart buttons, yours should too!
- Keep it under 100 words!
- Short, concise, and write to convert.
- Use your secondary keywords here!
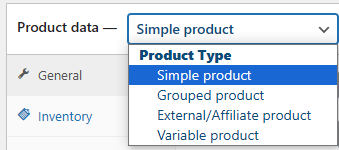
Product Data
This is where you select your product type, to keep things simple we’ll creating a simple product for now.
- Virtual – Disables shipping.
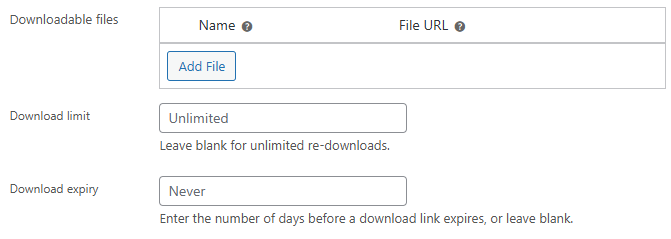
- Downloadable – Lets you add files that the customer will get access to after purchasing.
General
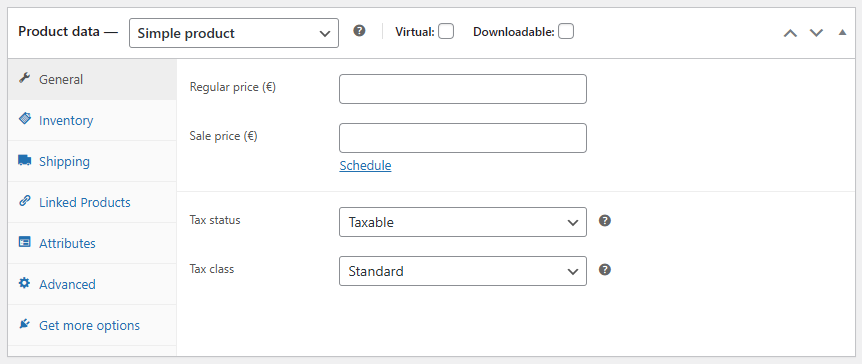
This is where pricing and tax information is entered. If you want to put a product on sale, enter an amount for the Sale price. You can also schedule the sale to automatically start or end on a certain date and time.
- Regular Price – The default price the product will advertise.
- Sale Price – If entered, the product will be put on sale for this amount.
- Tax Status – Whether or not taxes will be applied to the product.
- Tax Class – Which tax class will be applied to the product.
Inventory
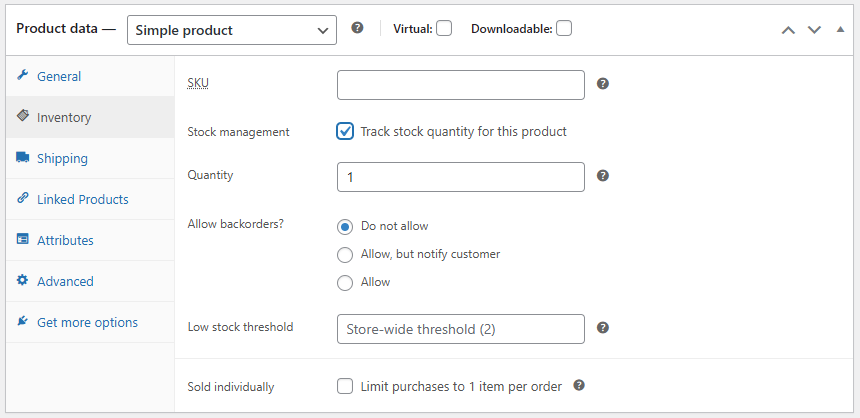
This is where you take charge of the inventory management system that comes with WooCommerce.
- SKU – Physical products typically have a unique barcode you can scan for this field, it will help you keep your stock in check.
- Stock Management – Do you want WooCommerce to track quantity for this product?
- Backorders – These control the customer’s ability to place orders even when the product is out of stock.
- Low Stock Threshold – Some products are considered to be “low stock” when there’s 5 available, while another can be low stock with 50 remaining, use this field to modify that threshold.
- Sold Individually – Do you want to limit the purchases to a single item per order? Use this. Keep in mind that customers will still be able to place multiple orders!

If you disable Stock Management, you will be able to manually modify the stock status of a product.
Overwhelming? Let us help.
Shipping
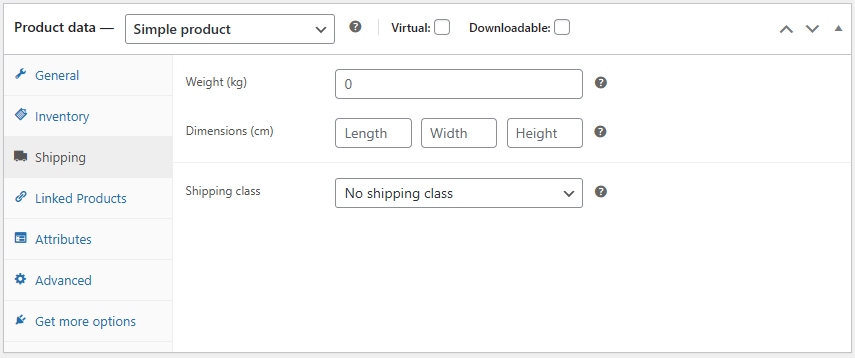
These fields are used to calculate shipping costs for your customers. If you have a shipping partner like DHL, they will absolutely require you to fill these in!
- Weight (kg) – Enter your product’s weight here. Decimal values are accepted so if the product weighs 100 grams, you should enter 0.1 here.
- Dimensions (cm) – How much area does the product take when packed? That information goes here.
- Shipping Class – In case you want this product to be a different shipping class for calculation purposes.
Linked Products
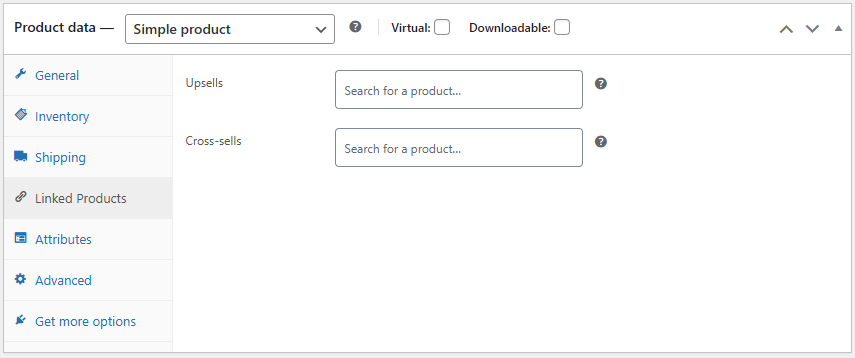
You know how some stores have products labeled “People also buy” and “Commonly bought with” – that’s what Upsells and Cross-sells are for. Whether or not these fields show up on your product page depend on your theme!
- Upsells – These are normally a tier above the item that you’re selling. For example, a more advance version of a tool, or a bundle deal!
- Cross Sells – Are you selling a mug for Valentine’s day? Cross sell a matching coaster to go along with it!
Attributes
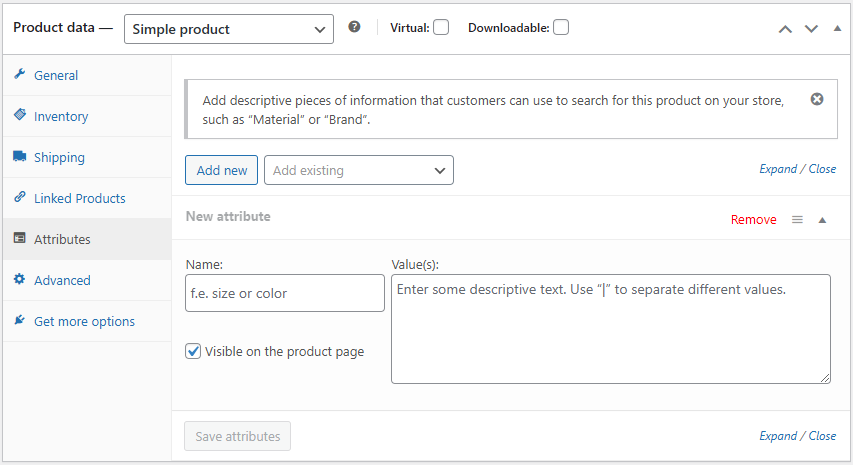
Item attributes are the cherry on top of everything you’ve done for your products already. You can fit all kinds of minute details here from size and color details, to brand names, ingredients, and warranty information.
But doing so can be a tedious task especially if you have a lot of products. Check out our guide on adding item attributes in bulk so you can skip the repetitive aspect of it.
Advanced
Do you want to have custom ordering for your items? Need to send a special note to the customer when this product gets ordered? You can do these from the advanced tab.
We also use this tab to implement custom functionality for our clients. For example, if they want to show flavor or color tags for this item on the shop page, we put the fields over here if they do not fit anywhere else.

Bulk Product Management Example
A vast majority of the product management tasks in WooCommerce can be completed without the need of any third party plugins or tools. All you need is an application like Excel or Google Sheets, and a spreadsheet wizard who can simplify the more complicated tasks like extracting the brand name from the product name and adding that as a category.
We’ll keep things simple for this article, let’s change our product names without manually editing every single product.
Export All Products
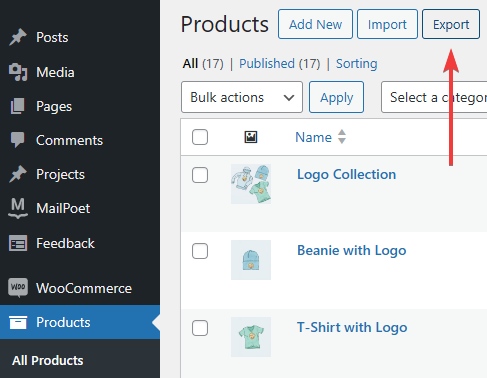
- Under WooCommerce → All Products → Click “Export“

- To keep things simple, we will only export the “ID” and “Name” fields.
- Click on “Generate CSV” after selecting the fields you want to export.
Modify the CSV

- It’s a good idea to make a backup of the downloaded CSV file in case of any mistakes!
- Open the CSV file.
- Make changes to the product names.
- Save the CSV file once you are done, make sure you do not save it over your backup!
Overwhelmed? Let us help.
Import Products
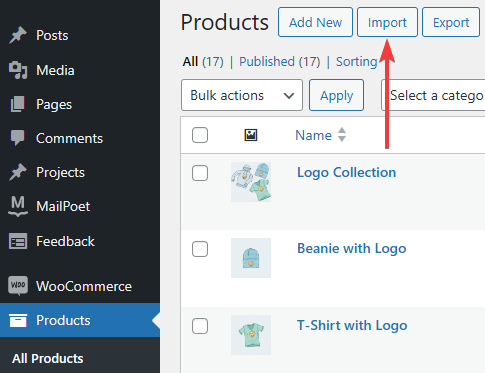
- Under WooCommerce → All Products → Click “Import“
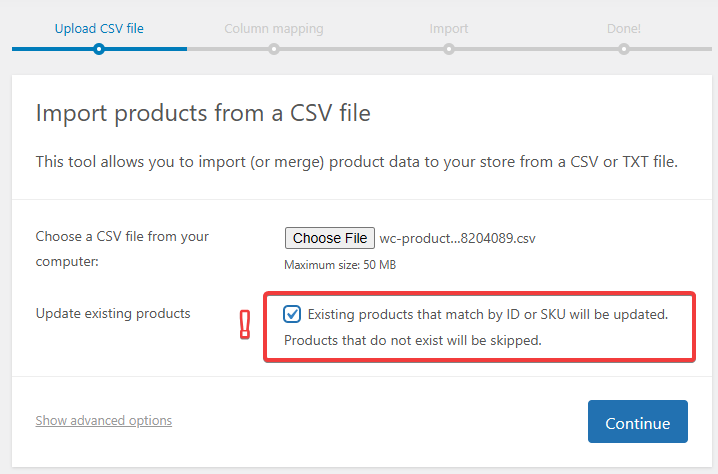
- Choose the CSV file with the updated product names.
- Check the “Update existing products” checkbox, otherwise WooCommerce will create new products from the uploaded file!
- Click “Continue“
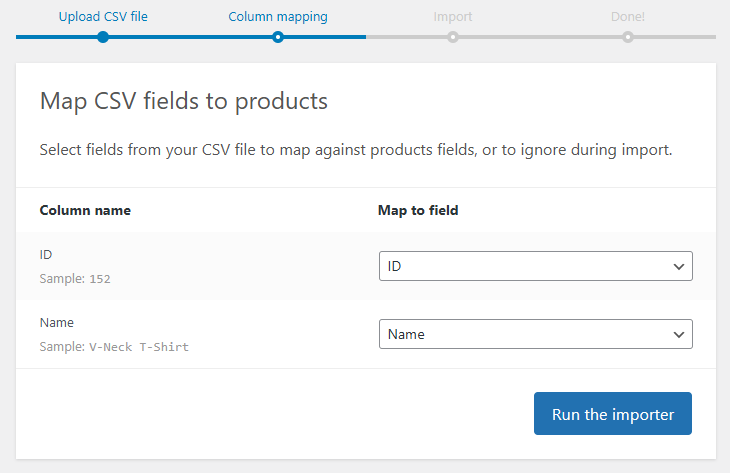
- If you did not make changes to the headers, you don’t need to do anything here either. Just make sure that the columns are mapped to the correct fields and you’re golden!
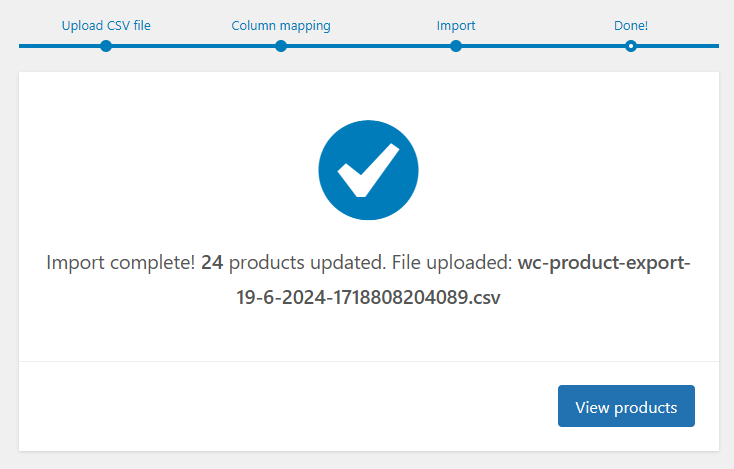
Run the importer when you’re done and WooCommerce should take care of everything else!
Outsourcing Product Management
Feeling overwhelmed with all these steps and details? Don’t worry, you’re not alone!
Many WooCommerce managers start with a burst of energy, only to find themselves buried under the avalanche of product listings, updates, and inventory management. It’s kind of like starting to clean your room and discovering you’ve got an entire hoarder’s episode on your hands.
Why not let Void Solutions (that’s us!) handle the heavy lifting for you? Imagine having all your products perfectly listed, descriptions SEO-optimized, and inventory seamlessly managed without you breaking a sweat. Ready to take the leap and simplify your life? Drop us a message for a free quote, and let us make your WooCommerce dreams come true!
Our team of WooCommerce wizards is here to turn that chaotic closet into a neatly organized paradise with our comprehensive suite of WooCommerce Services.